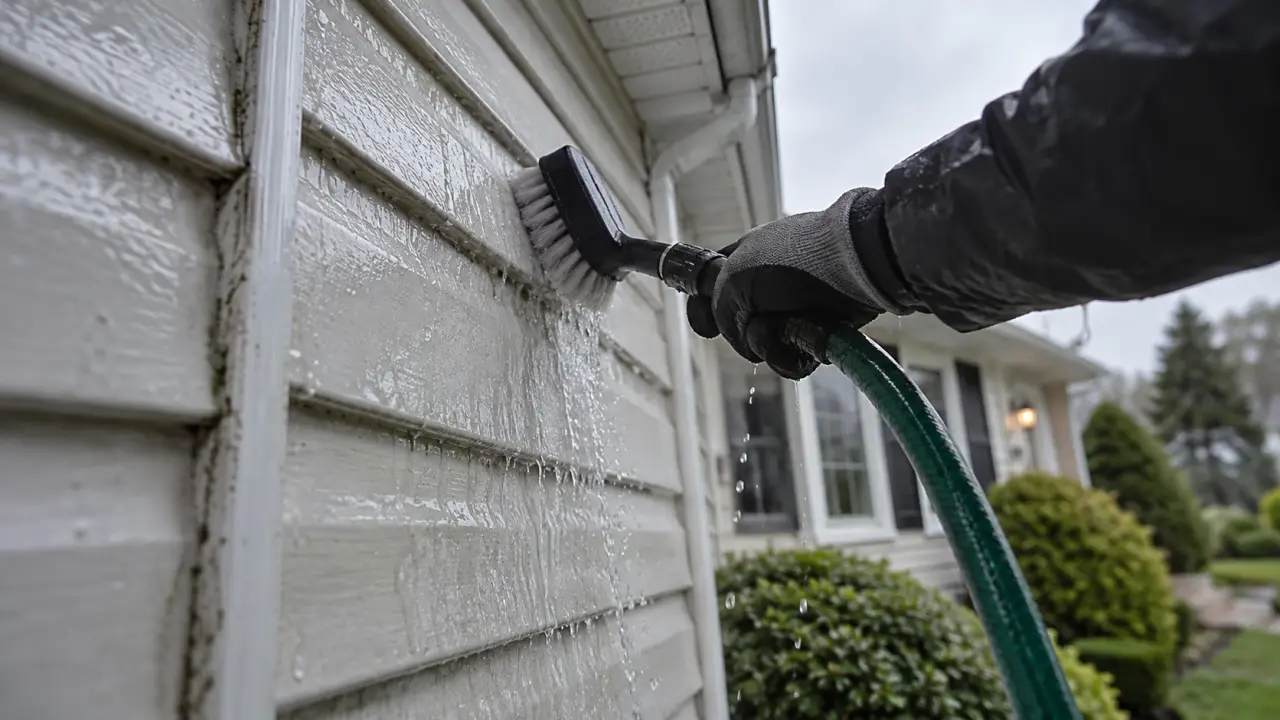
Siding maintenance is about more than keeping a house looking clean. It helps reveal the small failures that allow moisture to reach the wall behind the cladding, including loose panels, split caulk joints, overflowing gutters, and shrubs holding damp air against the exterior. A routine of cleaning, inspection, and drainage checks can stop these problems from becoming larger repair projects.
Build a siding maintenance routine around the seasons
Inspect siding at least twice a year, once in spring after winter weather and again in fall before prolonged rain, snow, or freezing temperatures. Clean the exterior once or twice a year, depending on shade, nearby trees, traffic dust, and humidity. A rinse every 6–12 months is often enough between deeper cleans.
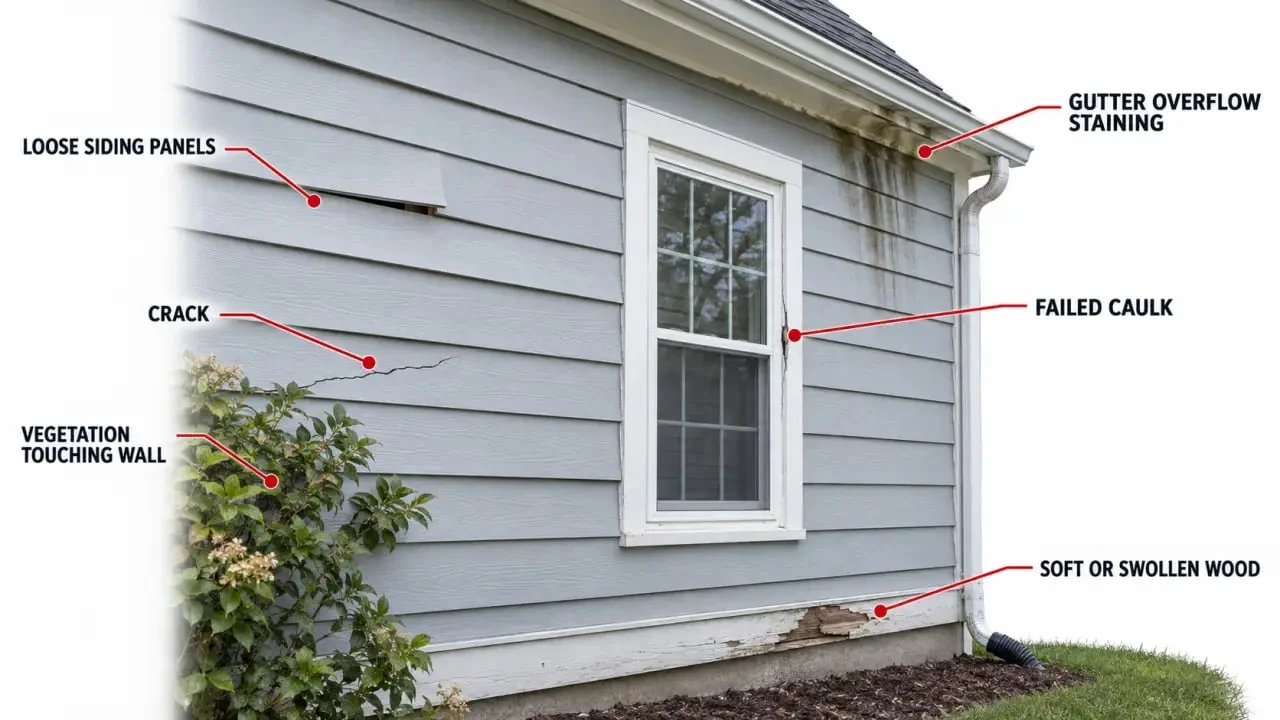
- Spring: Clear debris from gutters and downspouts, check for winter cracks or loose panels, and wash away grime before it becomes embedded.
- Summer: Check shaded walls for algae, mold, or mildew, and trim plants that touch the house.
- Fall: Remove leaves from gutters, inspect sealant around windows and doors, and make sure downspouts discharge away from the foundation.
- After a storm: Look for lifted panels, impact damage, missing pieces, and water marks below roof edges.
Keep a few photos of each exterior wall on your phone. Comparing the same corner, seam, or window trim over time makes fading, movement, and widening gaps easier to spot.
Clean siding without forcing water behind it
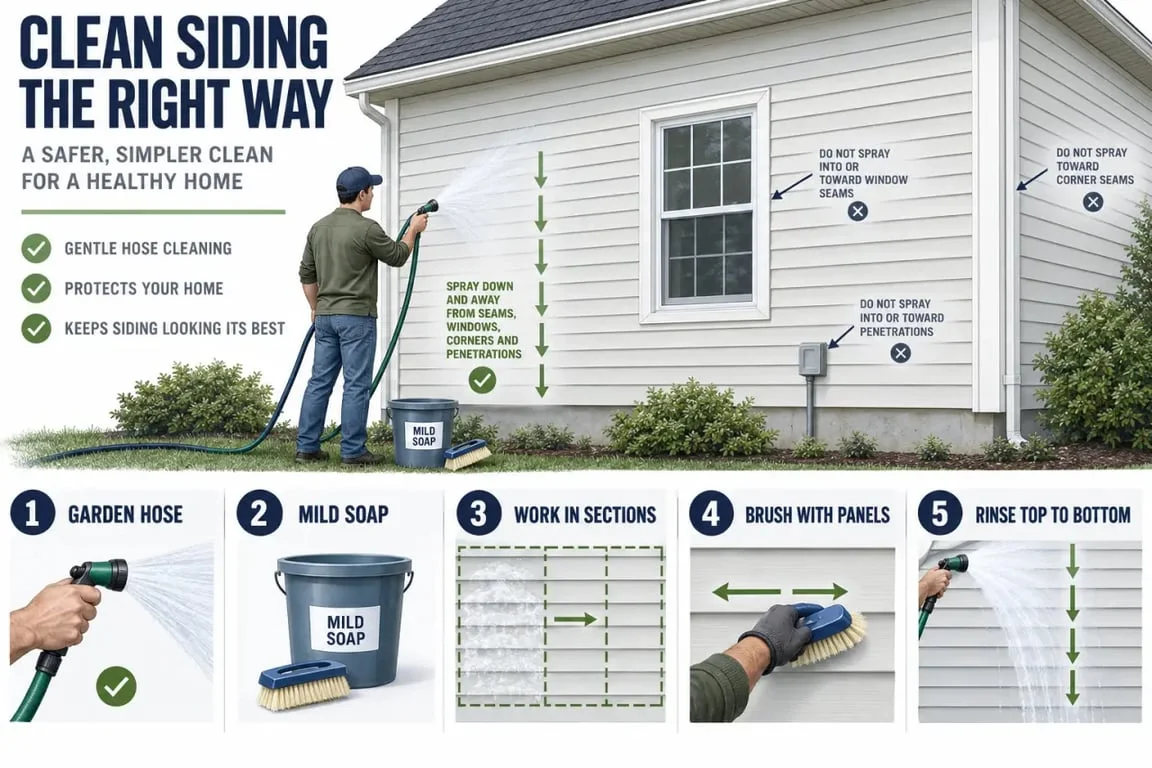
For routine dirt, use a garden hose, mild liquid dish soap, and a soft cloth, sponge, or nonmetal soft-bristle brush. Work in manageable sections and follow the direction of the planks, shingles, or panels. Rinse before the soap dries, because dried cleaner can leave streaks or a dull film.
A safe washing sequence
- Cover or move delicate outdoor items and close nearby windows.
- Wet a small section of siding.
- Apply a mild soap-and-water solution with a soft tool.
- Agitate gently instead of scrubbing hard.
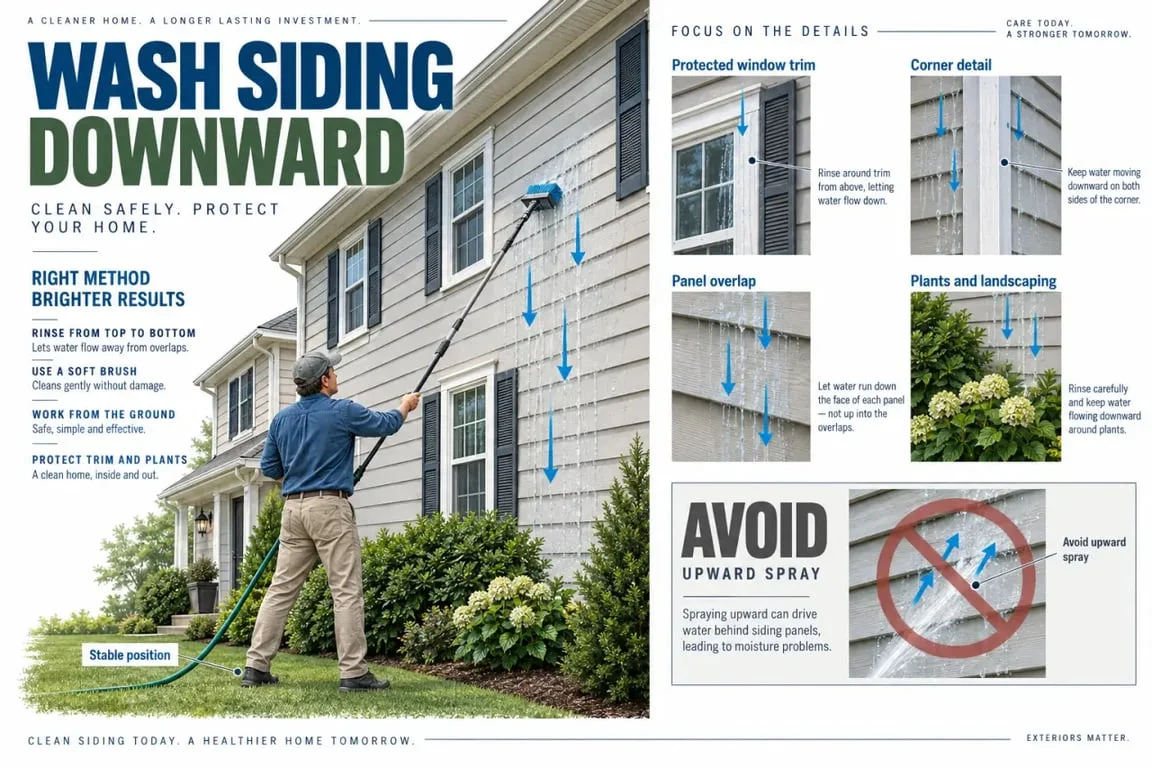
- For a whole wall, wash from bottom to top to limit streaking, then rinse from top to bottom.
Avoid metal brushes, abrasive pads, acids, organic solvents, and aggressive chemicals. They can scratch the finish, discolor the surface, or damage the coating that protects the material.
Be cautious with pressure washing
Pressure washing is not a default maintenance method. Excessive pressure can crack seams, damage finishes, and push water behind panels, especially around lap joints, corners, trim, windows, and utility penetrations. If the manufacturer permits it, use low pressure, keep the spray moving, and aim downward rather than upward into overlaps. When in doubt, the hose-and-soft-brush method is slower but safer.
Match the care to the siding material
Low maintenance does not mean no maintenance. The right cleaner, coating care, and repair method depend on the siding installed on the house.
| Material | Routine care | Watch closely for | Repair approach |
|---|---|---|---|
| Vinyl | Hose, mild soap, soft brush | Warping, cracks, loose or missing panels | Replace damaged panels rather than trying to patch them |
| Fiber cement | Gentle washing; inspect caulk and paint | Chips, failed caulking, fading | Minor chips may be patched; repaint as needed, often every 10–15 years |
| Wood | Clean, inspect, seal, or stain | Peeling finish, soft spots, rot, insect activity | Address moisture first, then repair or replace affected boards |
| Engineered wood | Follow the product instructions; maintain the finish and seams | Edge swelling, coating damage, water exposure | Repair promptly before exposed edges absorb moisture |
| Insulated siding | Gentle cleaning and panel checks | Dents, panel separation, distorted joints | Use compatible replacement pieces to preserve the fit |
Remove stains while checking what caused them
Surface dirt usually responds to mild soap and water. Oil or grease marks also call for mild liquid dish soap, applied gently and rinsed thoroughly. For mold and mildew, use a mildew-specific cleaner exactly as directed on its label. Wear appropriate protection and protect nearby plants from runoff.
Do not treat every dark patch as a cleaning issue. Algae and mildew commonly return on north-facing walls, beneath roof overhangs, or behind dense planting because these areas stay damp. Cleaning removes the visible growth. Correcting the moisture conditions is what helps prevent it from returning.
Water tends to move toward the weakest point, such as a small gap beside a window, a failed seal at a pipe penetration, or a panel edge repeatedly hit by gutter overflow. The stain on the siding may be several inches away from the actual entry point. Trace upward and sideways, checking roof runoff, flashing, seams, and vegetation before assuming the wall itself is the cause.
Know when cleaning should become a repair call
Cleaning is a useful time to inspect for cracks, chips, holes, buckling, fading, loose panels, gaps, pest activity, and soft or swollen material. Pay special attention to areas around windows, doors, corners, rooflines, and downspouts. These transitions are where water-management details matter most.
Trim vegetation so it stays at least 12 inches away from the house. This improves air circulation, prevents branches from rubbing the finish, and keeps wet leaves from trapping moisture against the wall. Also check that gutters are clear and downspouts do not overflow or discharge water near the foundation.
Call a siding professional when panels repeatedly come loose, a wall feels soft, staining returns after cleaning, caulk gaps keep reopening, or you suspect water has entered behind the cladding. Repainting or replacing a visible piece without solving the leak path can hide the warning sign while the damage continues out of sight.
{“@type”:”Article”,”@context”:”https://schema.org”,”headline”:”Siding Maintenance Prevents Water Damage When You Check These Small Gaps”,”inLanguage”:”en-US”,”description”:”Siding maintenance is about more than keeping a house looking clean. It helps reveal the small failures that allow moisture to reach the wall behind the cladding, including loose…”}
Plan the repair before you start
Most home improvement projects go better when you separate inspection, preparation and execution. Look for water damage, loose fasteners, unsafe access, hidden utilities and signs that a small visible defect may hide a larger problem. A quick checklist can prevent buying the wrong product or starting a repair that should be handled by a licensed contractor.
Safety comes first on roofs, decks, plumbing, electrical work and exterior structures. If the job requires climbing high, opening sealed systems, handling gas or changing load-bearing parts, treat this guide as planning help rather than a replacement for professional work.
Related guides to continue
To build a stronger understanding of this topic, continue with these related guides from the same site. They cover nearby decisions, maintenance points and practical details that often influence the final result.