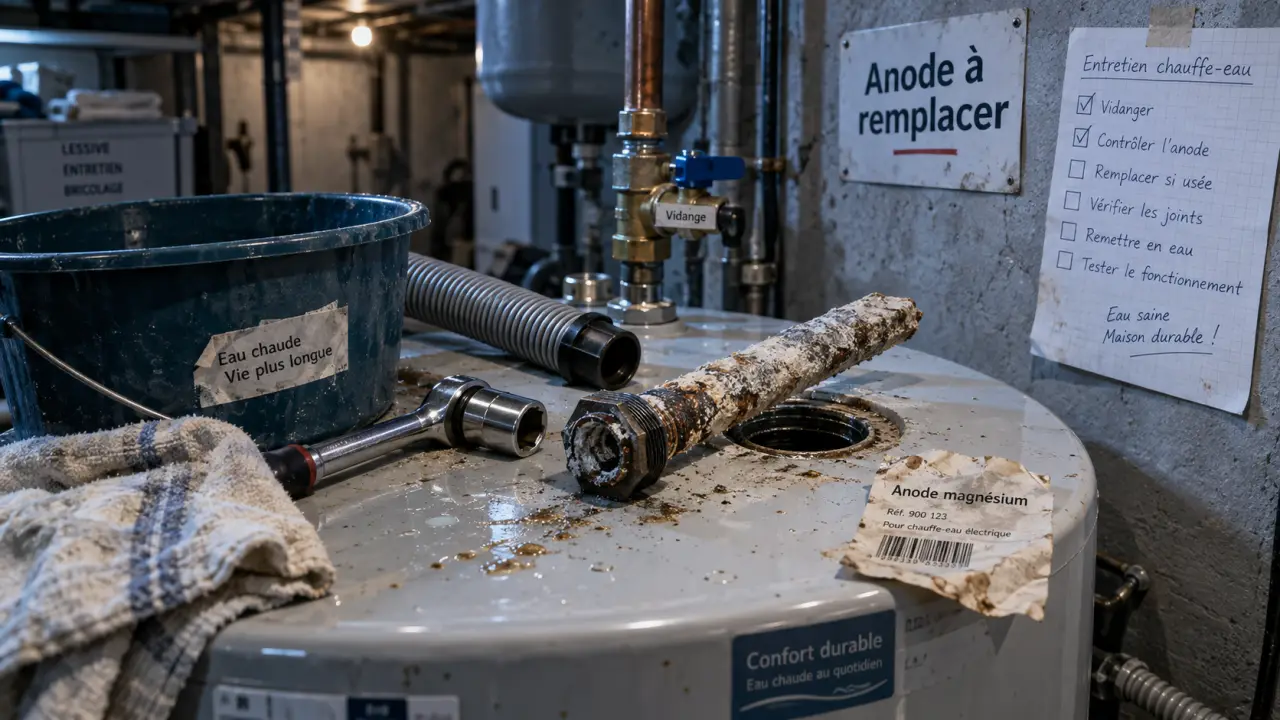
A water heater anode rod protects the tank from internal corrosion. Replacing it is a manageable maintenance task, but the restart sequence matters: restoring power before the tank is completely full can burn out electric heating elements. The job also requires the correct replacement rod, careful draining, and enough restraint to avoid damaging the tank or its connections.
Know when the anode rod needs attention
The anode rod usually screws into the top of the tank, sometimes beneath a plastic cap. Its steel core is coated with a metal that corrodes more readily, commonly magnesium, aluminum, or zinc. As this outer material is consumed, it draws corrosive activity away from the water-soaked steel walls inside the tank. Leaving the opening empty after removal means giving up that protection.
Inspect before tank corrosion takes over
Plan an inspection annually or every other year, especially with hard water or a water softener. Changes in water chemistry can accelerate depletion. Replacement is often anticipated every 2 to 4 years, although difficult conditions can shorten the lifespan to 6 months, while other installations may last up to 6 years.
Physical inspection is more reliable than guessing from age alone. Replace the rod if it is deeply pitted, greatly reduced in diameter, missing most of its coating, or worn down to the steel wire core.
Water quality can provide useful warning signs. A new rotten-egg odor, gritty debris at faucet aerators, or unusual popping sounds from the tank should prompt a closer look at the whole system, not an automatic diagnosis. These symptoms may point to mineral buildup, bacteria, or a depleted anode. Inspect the rod while the tank is still dry on the outside and the fittings remain sound, rather than waiting for a leak that cannot be repaired.
Prepare the heater, tools, and replacement rod
Check the water-heater manufacturer and model information before buying a rod. Confirm the thread type, length, diameter, and available clearance above the tank. A low ceiling may require a flexible or segmented rod instead of a full-length rigid model. If the tank already leaks, has heavily corroded connections, or shifts when force is applied, stop. A new anode will not rescue a failed tank.
- A socket wrench and the correct socket. A 1-1/16-inch socket is common for the top connection.
- A short drain hose and utility bucket.
- Thread sealant suitable for potable-water fittings, if the replacement rod specifies it.
- An electric impact wrench for a seized fitting, used carefully.
- Gloves and a clear route above the heater for extracting the old rod.
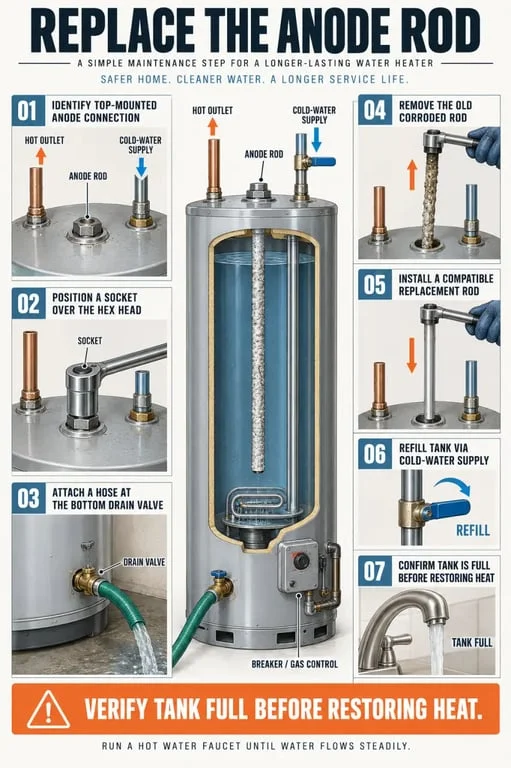
For an electric water heater, switch off the circuit breaker first. For a gas model, use vacation mode if appropriate for the appliance so you do not unnecessarily relight the pilot. Shut off the cold-water supply. Hot water can scald, so allow the tank to cool if possible and open a hot-water faucet to relieve pressure before draining.
Replace the rod without stressing the tank
- Attach the hose to the drain valve and direct it into a bucket or suitable drain. Drain several gallons. A partial drain reduces the water released when the rod is removed.
- Locate the anode hex head on top of the tank. Remove any cover and place the socket squarely over the fitting.
- Turn counterclockwise to loosen the rod. Keep the tool aligned so force is applied to the fitting, not sideways through the tank connections.
- Lift the rod straight up once the threads are free. If it catches the ceiling, bend only a flexible replacement rod. Do not force a rigid old rod against nearby pipes.
- Inspect the threads and opening. If the threads are damaged or the tank fitting moves, call a plumber instead of tightening against compromised metal.
- Install the compatible new rod. Hand-thread it first to avoid cross-threading, then tighten it firmly with the socket wrench without excessive force.
Refill completely before restoring heat
Close the drain valve, reopen the cold-water supply, and leave a hot-water faucet open until water flows steadily without sputtering. Check the anode fitting and drain valve for leaks. Only after the tank is completely full should an electric heater be switched back on. Energizing electric elements in an empty or partly filled tank can burn them out.
Return a gas heater to its normal setting according to its operating instructions, then monitor the area during the next heating cycle. If the heater does not operate normally or a connection leaks, shut it down and arrange a professional inspection.
Choose the rod material for your water conditions
| Option | Useful consideration | Trade-off |
|---|---|---|
| Magnesium | A common sacrificial choice for tank protection. | May be consumed quickly where water chemistry is aggressive. |
| Aluminum | Often considered where conventional rods deteriorate rapidly. | Compatibility and water conditions still need checking. |
| Zinc | Another sacrificial-metal option used in anode rods. | Choose only a rod designed for the heater and local water conditions. |
| Powered anode | Uses an electrical power supply rather than relying solely on sacrificial metal. | Requires a compatible installation and a power connection. |
There is no universal best anode material. Start with the heater manufacturer’s requirements, then consider how quickly previous rods have disappeared and whether odor complaints are present. A powered anode can be worth discussing when conventional rods are depleted unusually fast, but it does not replace checks of the tank, fittings, and installation.
Handle a stuck anode rod without creating a bigger repair
A stubborn anode is common because the threads sit in a hot, damp environment for years. Avoid WD-40 or another penetrating oil. It may help loosen threads, but it can contaminate a potable-water tank. Long cheater bars can also twist the heater or strain water and gas connections.
An electric impact wrench, used with a correctly fitted socket and short, controlled bursts, is often the safer escalation. Keep the socket square on the fitting and stop if the tank, piping, or connection begins to move. More force is not always the right solution when the surrounding metal is already corroded.
Call a qualified plumber or water-heater technician if the tank moves, piping flexes, the fitting will not release, threads appear damaged, or you are uncertain about gas controls. Professional help is also sensible when ceiling clearance prevents safe extraction. The anode protects the tank, but damaging the tank while trying to replace the rod defeats the maintenance plan.
{“@type”:”Article”,”@context”:”https://schema.org”,”headline”:”Replace a Water Heater Anode Rod Without Burning Out the Heating Elements”,”inLanguage”:”en-US”,”description”:”A water heater anode rod protects the tank from internal corrosion. Replacing it is a manageable maintenance task, but the restart sequence matters: restoring power before the…”}
Related guides to continue
To build a stronger understanding of this topic, continue with these related guides from the same site. They cover nearby decisions, maintenance points and practical details that often influence the final result.